Virtual machines
Create a VM
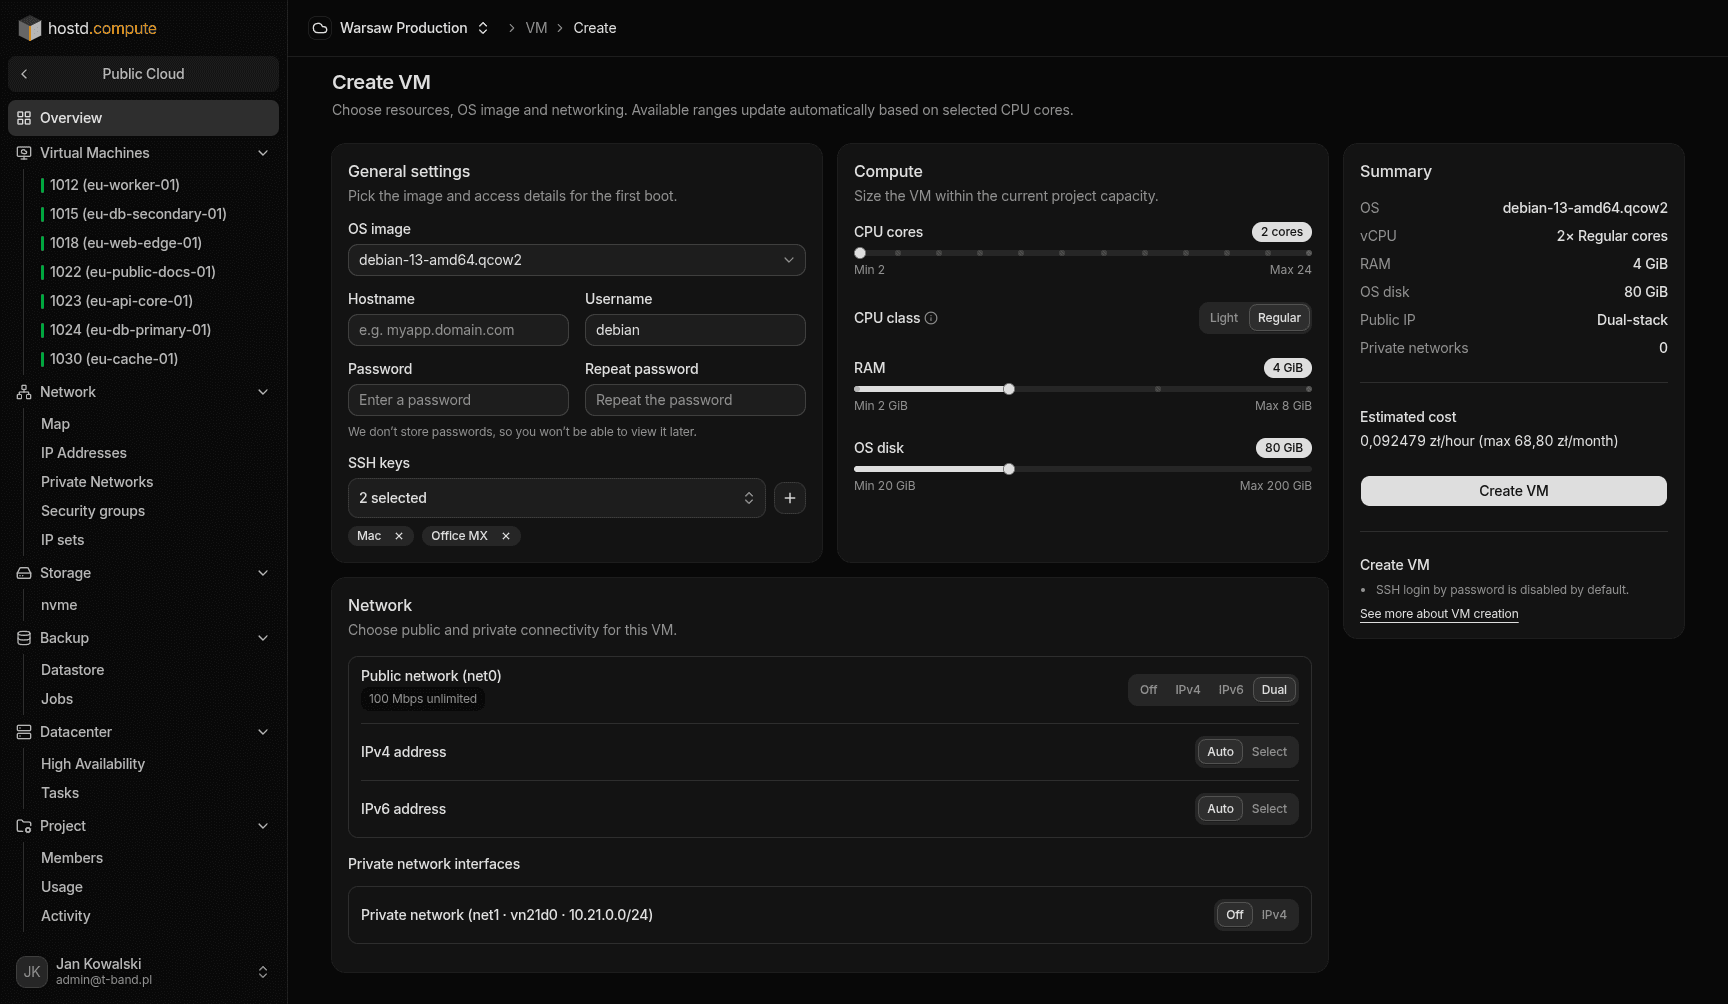
How to create a VM with Linux image, CPU class, resources, SSH keys, and networking.
Creating a Linux VM: image, CPU class, resources, SSH keys, and networking.
Before you begin
- Access to the project with Admin or Superadmin role.
Steps
- Open the project and click Create VM.
- Choose an image, hostname, and username, and set a password. We do not store passwords — you cannot view it in the portal later.
- Set CPU class (Regular or Light), vCPU, RAM, and OS disk size.
- Add SSH keys.
- Choose networking: public WAN mode (Off, IPv4, IPv6, or IPv4 + IPv6), a private network LAN interface, or both.
- Click Create and wait about a minute (initial system setup runs in the background).
Watch out
- On all Linux images, SSH password login is disabled — only SSH keys work. To enable password SSH, see SSH password login.
- Minimum vCPU is 2, step is 2. RAM is chosen from tiers based on vCPU count. The OS disk is a range from 10× to 100× the vCPU count in GiB, in 20 GiB steps — with 4 vCPU that is 40 to 400 GiB.
- The system disk is limited to 15,000 IOPS and 500 MB/s (read and write). See Storage.
- Public WAN modes: Off (no public address), IPv4, IPv6, or IPv4 + IPv6. On an attached VM you can only switch Off ↔ the same mode; to change between IPv4 / IPv6 / dual-stack, turn WAN off first.
- Hourly public IP billing applies to IPv4 only. Public IPv6 is included without a separate IP charge.
- HA is not enabled at create time; enable it later in
Datacenter → High Availability.